Daylight sensors / Multi-meter
Daylight sensor
When configuring daylight sensor control for a zone, it is important to consider whether luminaires may need to be configured with daylight to optimize the achieved dimming conditions. User also can use a daylight sensor to control a large area, or every single luminary uses their own daylight sensor (please refer to the Scene section of daylight sensor usage strategy).
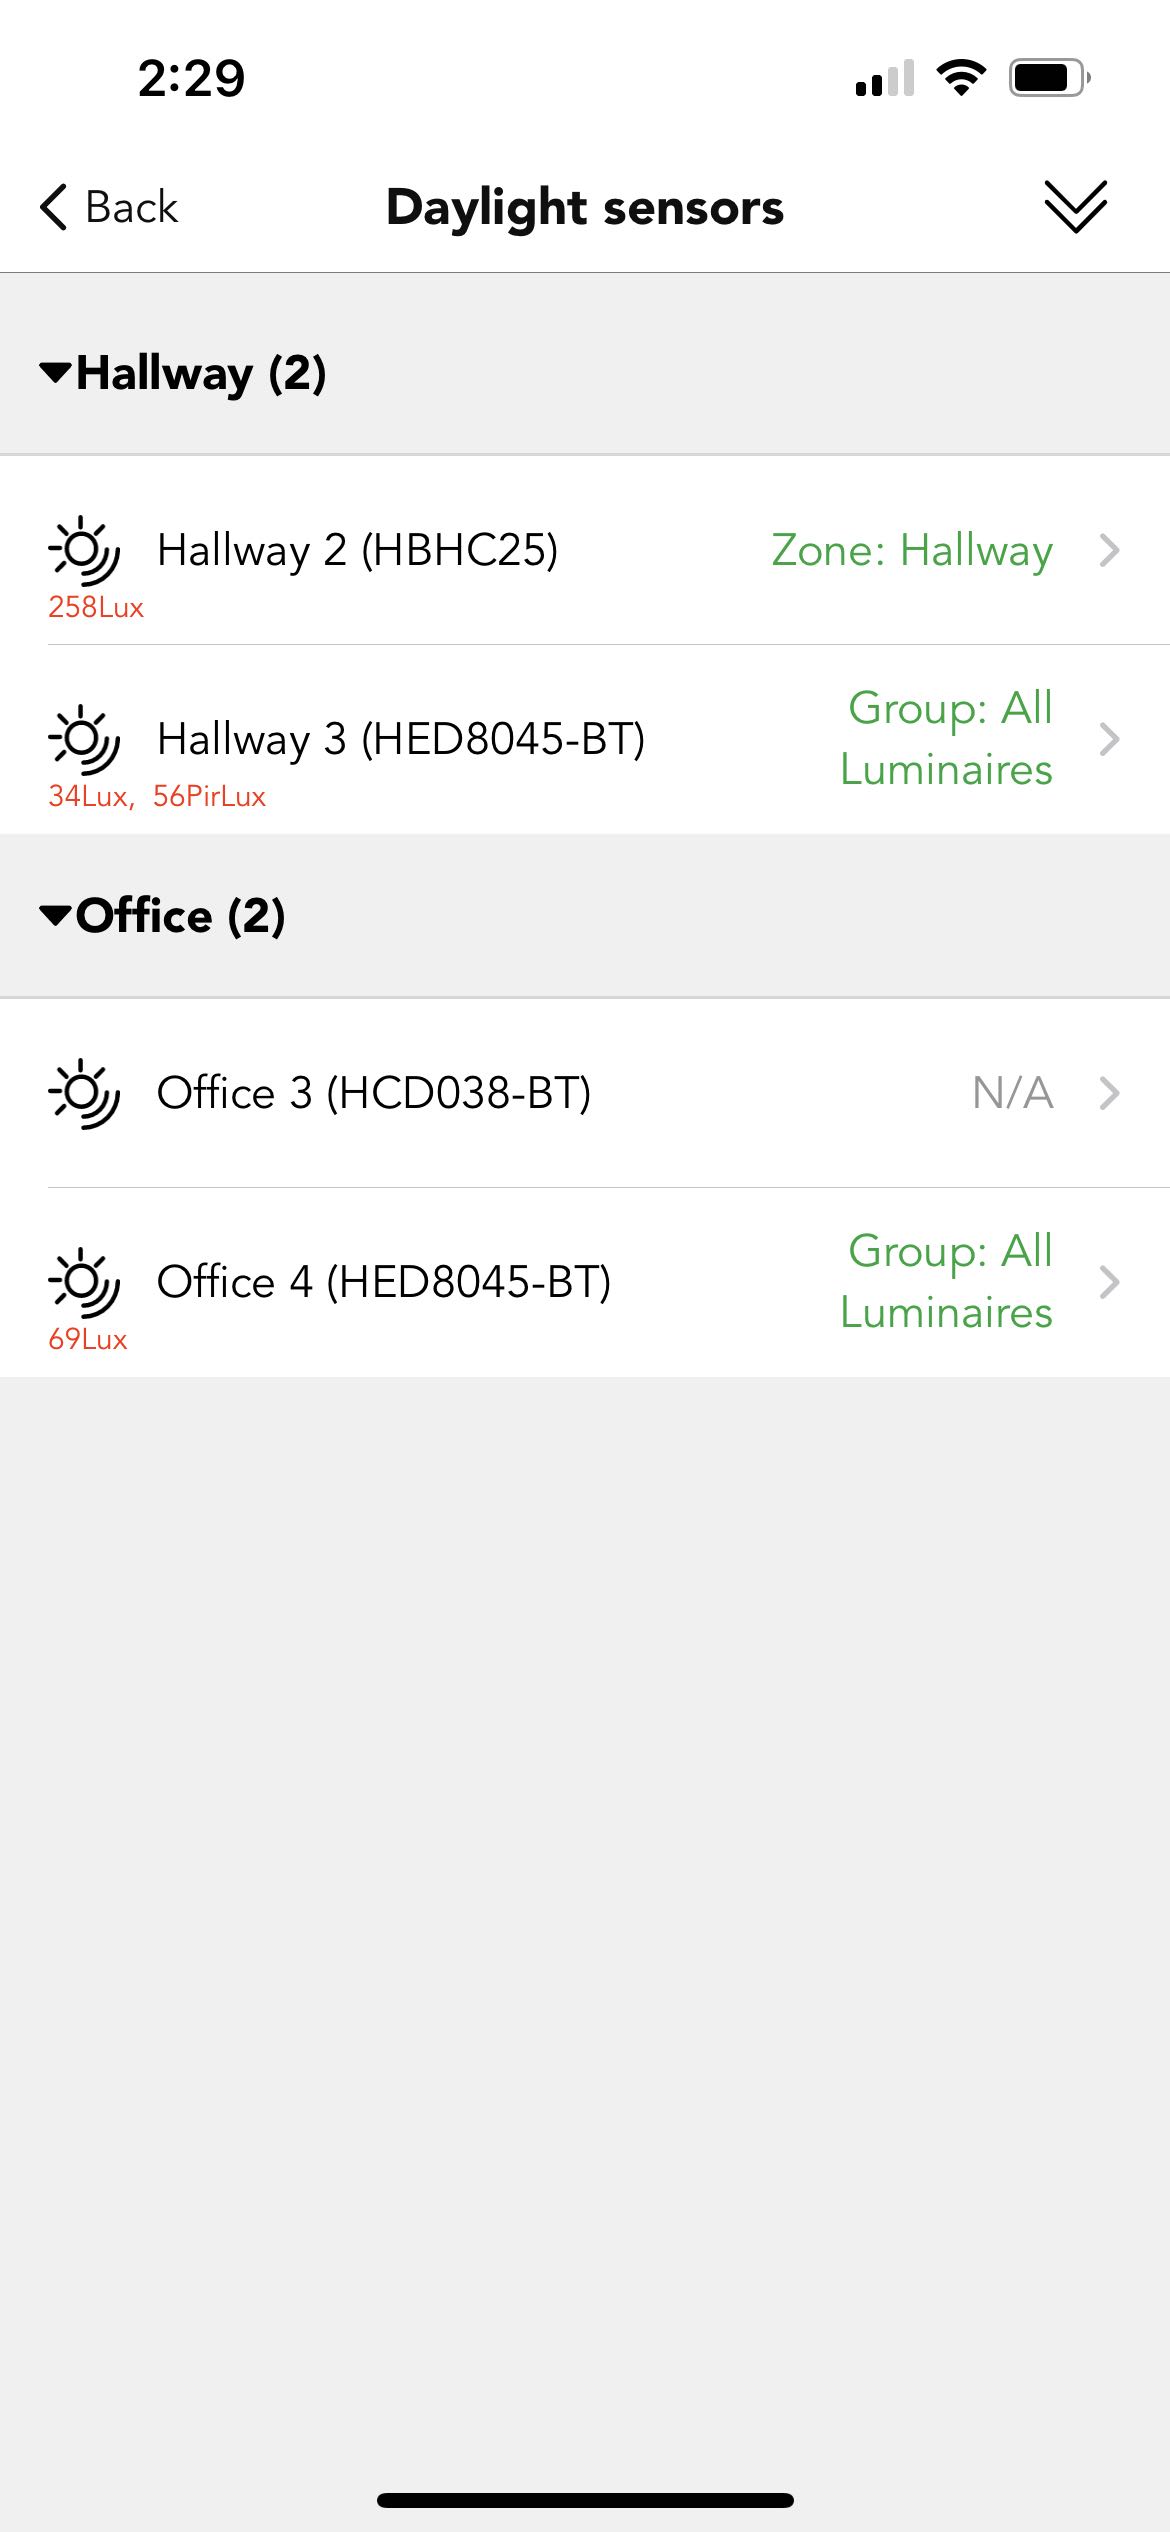
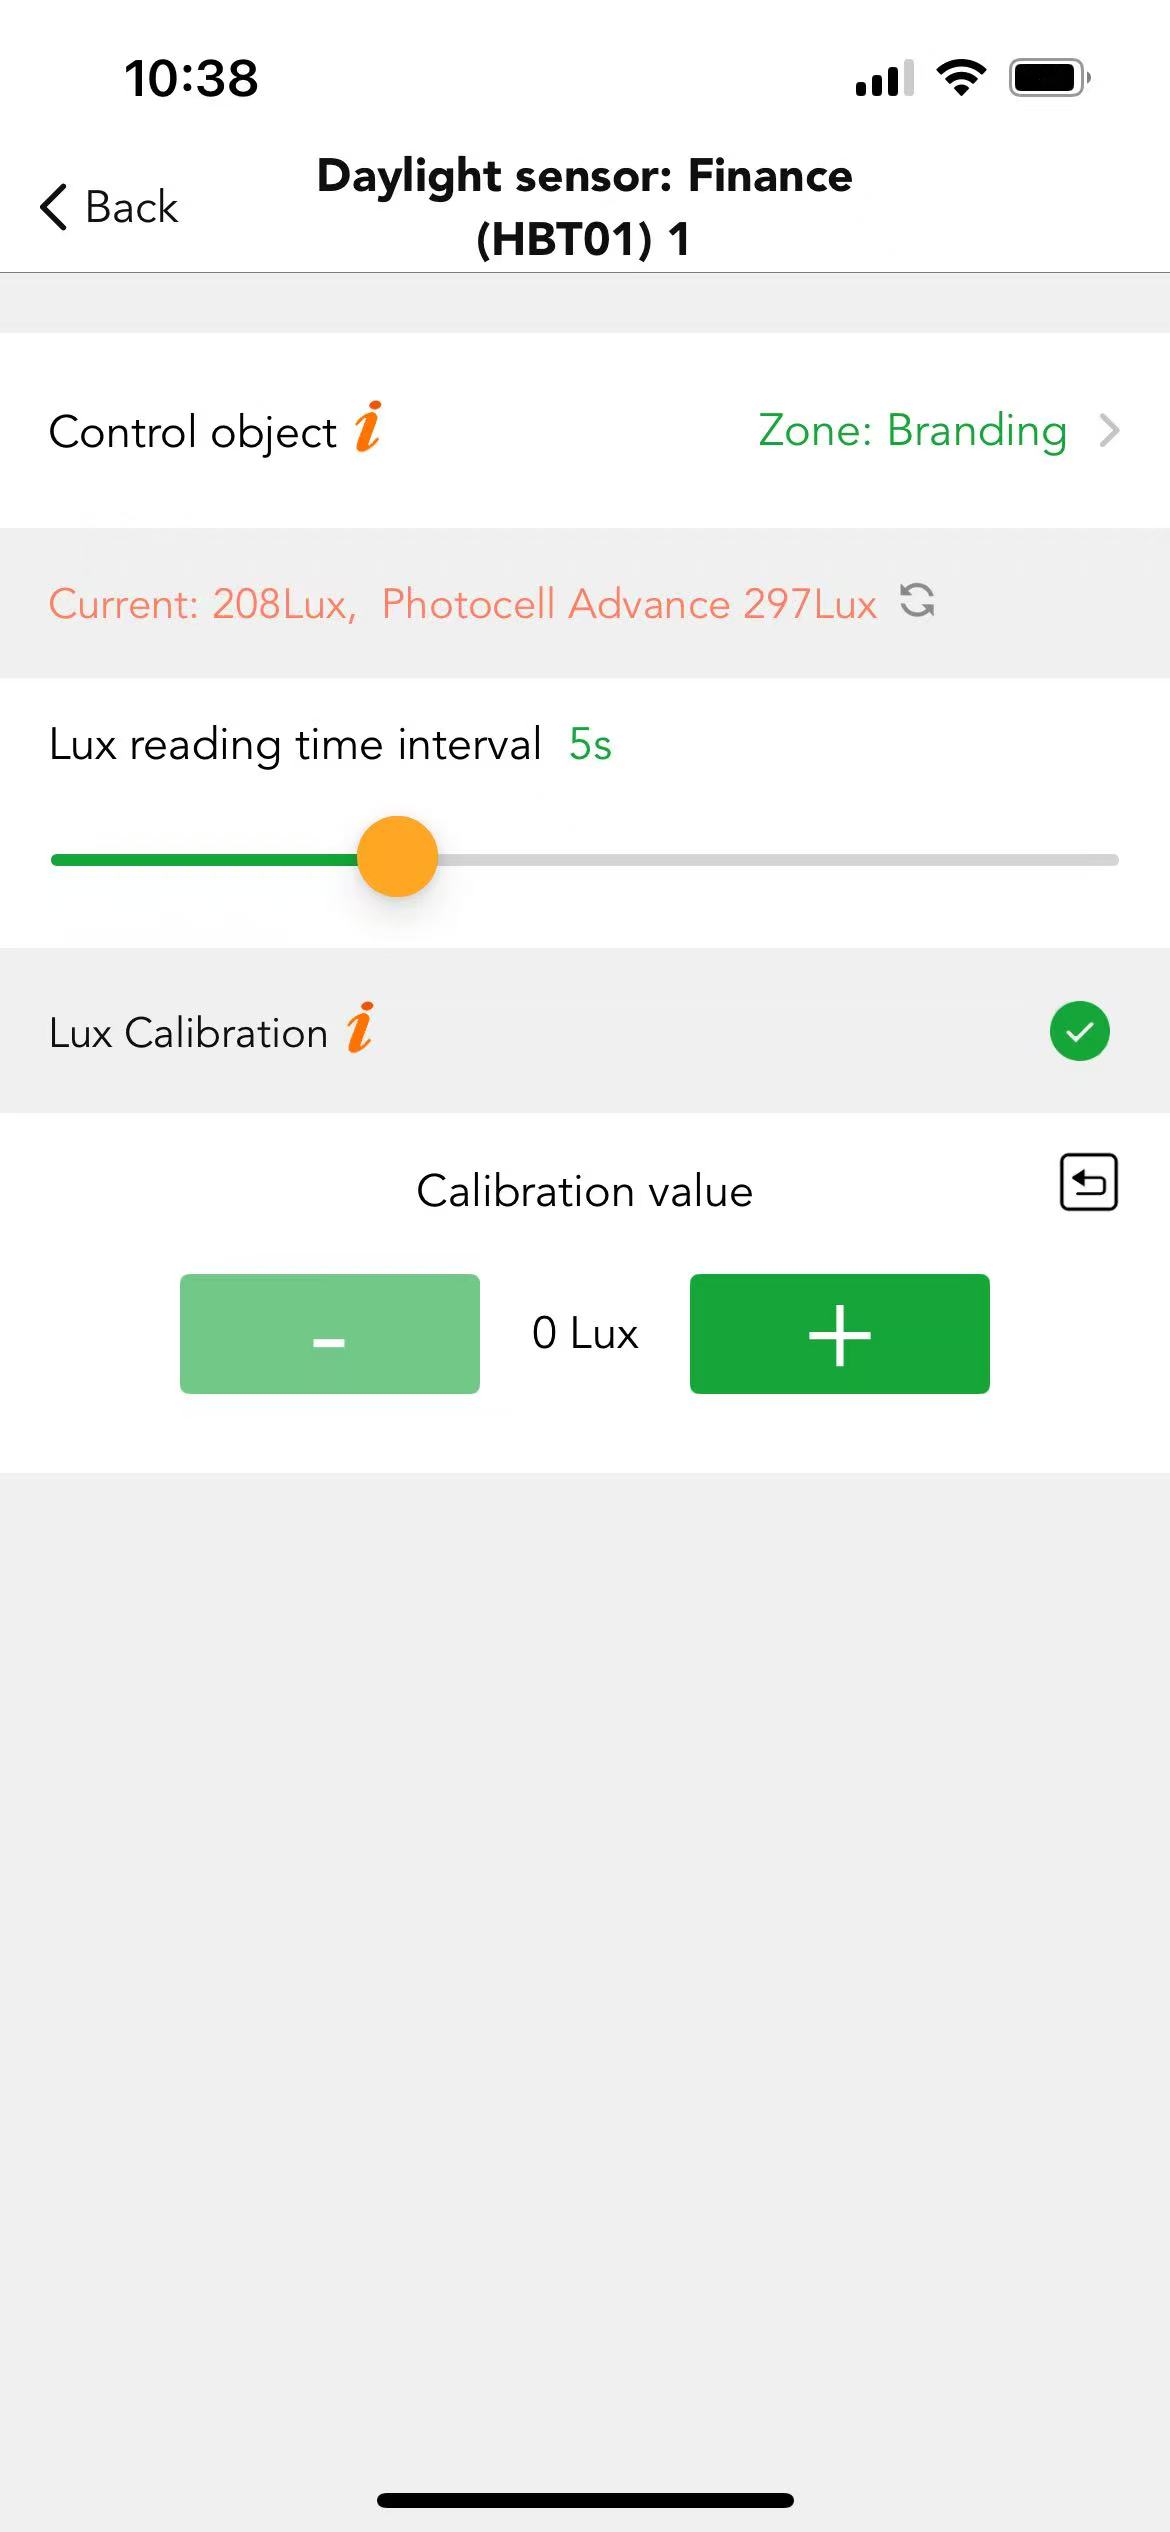
Koolmesh list out all the sensor with daylight function. Some products can distinguish natural and artificial light which means having two current lux values, one is current ambient lux another is Photocell Adcance (natural value); like luminaire "Finance (HBT01) 1", 208 Lux is the current ambient lux; 297 Photocell Advance is the current natural value. But some products can only detect the ambient lux, like "Hallway 2(HBHC25)". All these depend on the product features. If user would like to check the lux value, user needs to set the “control object” first, otherwise the lux value is not available, like "Office 3(HCD038-BT)".
● Control object
Control object which enables user to select a single luminary or a group even a zone.
Lux value is visible in the daylight sensor interface when users have set the control object; if the control object is control each sensor's own luminaire, then users can see nothing in the daylight sensor interface,but can check the value in a specific daylight sensor interface, like Finance (HBT01) 1,which is convenient for users to check the lux value, without setting each control object .
There is a reset button  available which enable users to reset the value of calibration. When there is a big gap between current value and actual ambient lux, then users can use this button to reset the value.
● Lux calibration
Because the lux value received by the sensor is often not the same as the actual lux received on the surface below it, which means if users would like to maintain a specific amount of light on that object or surface, users need to calibrate the sensor lux value shown in the Koolmesh app. In order to reduce deviations, we don’t use the original lux calibration method, and the following example is used for the current practice.
Example: In the office,the work area (desk surface) needs to be maintained in a specific amount of light like 500 Lux. In this case,users need to measure out the lux value of the desk surface. All users need to do is use a lux meter and put it on the desk right under the luminary and turn on the luminary(recommend in a dark environment). Users can make the desktop illuminance meter display as the target value by adjusting the brightness of the luminary, and then fills the lux value displayed on the APP in the Closed loop scene setting page as the target value.
Multi-Meter
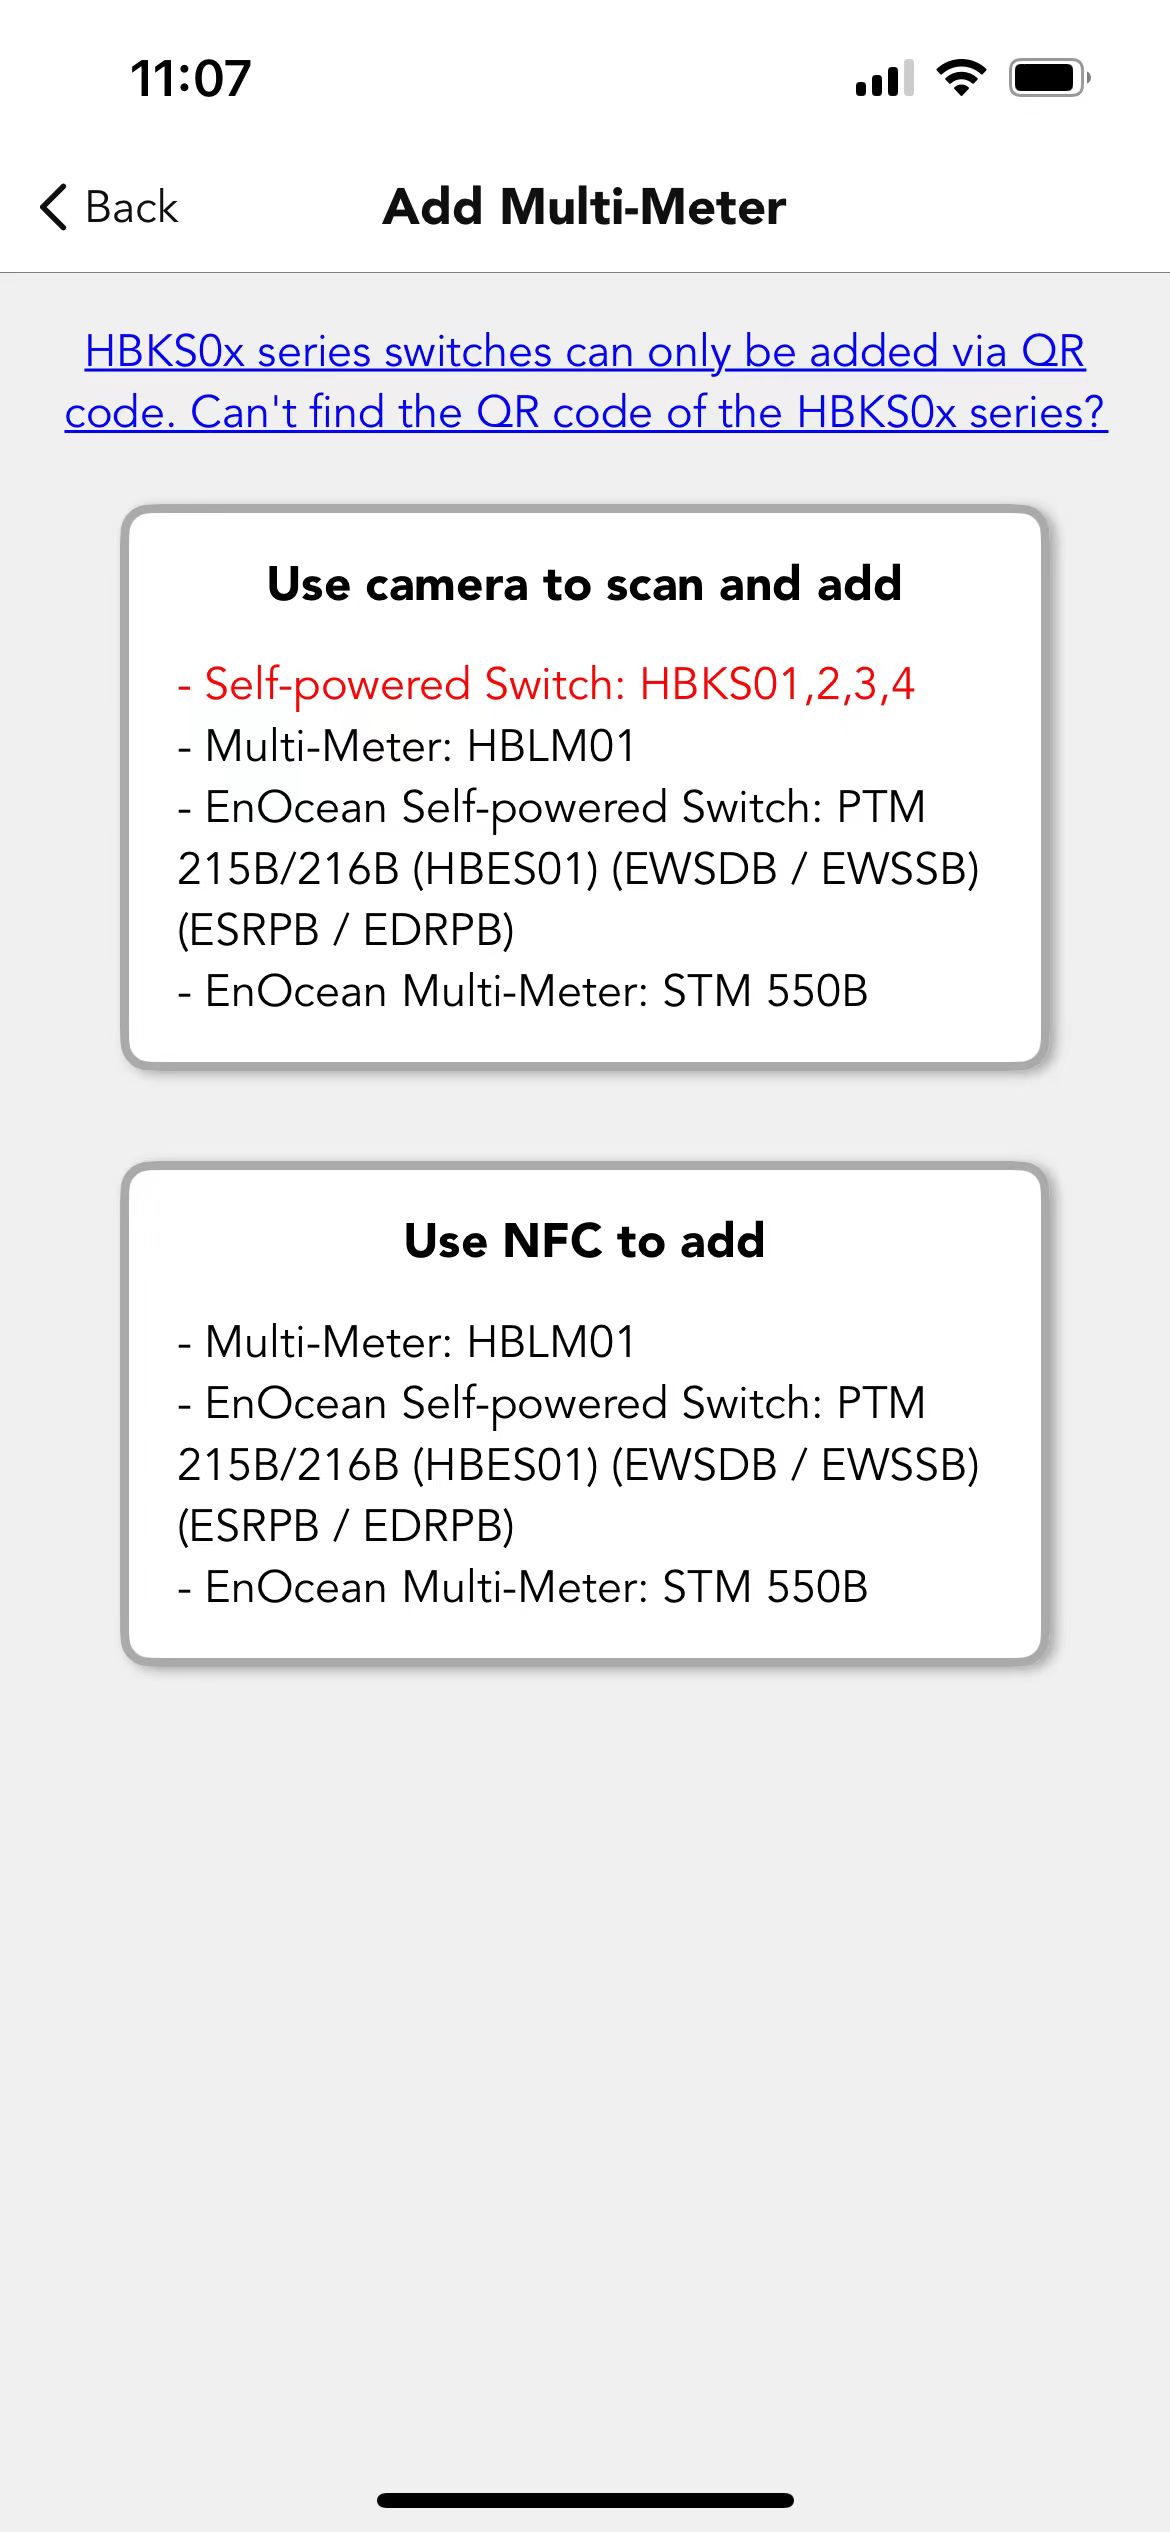
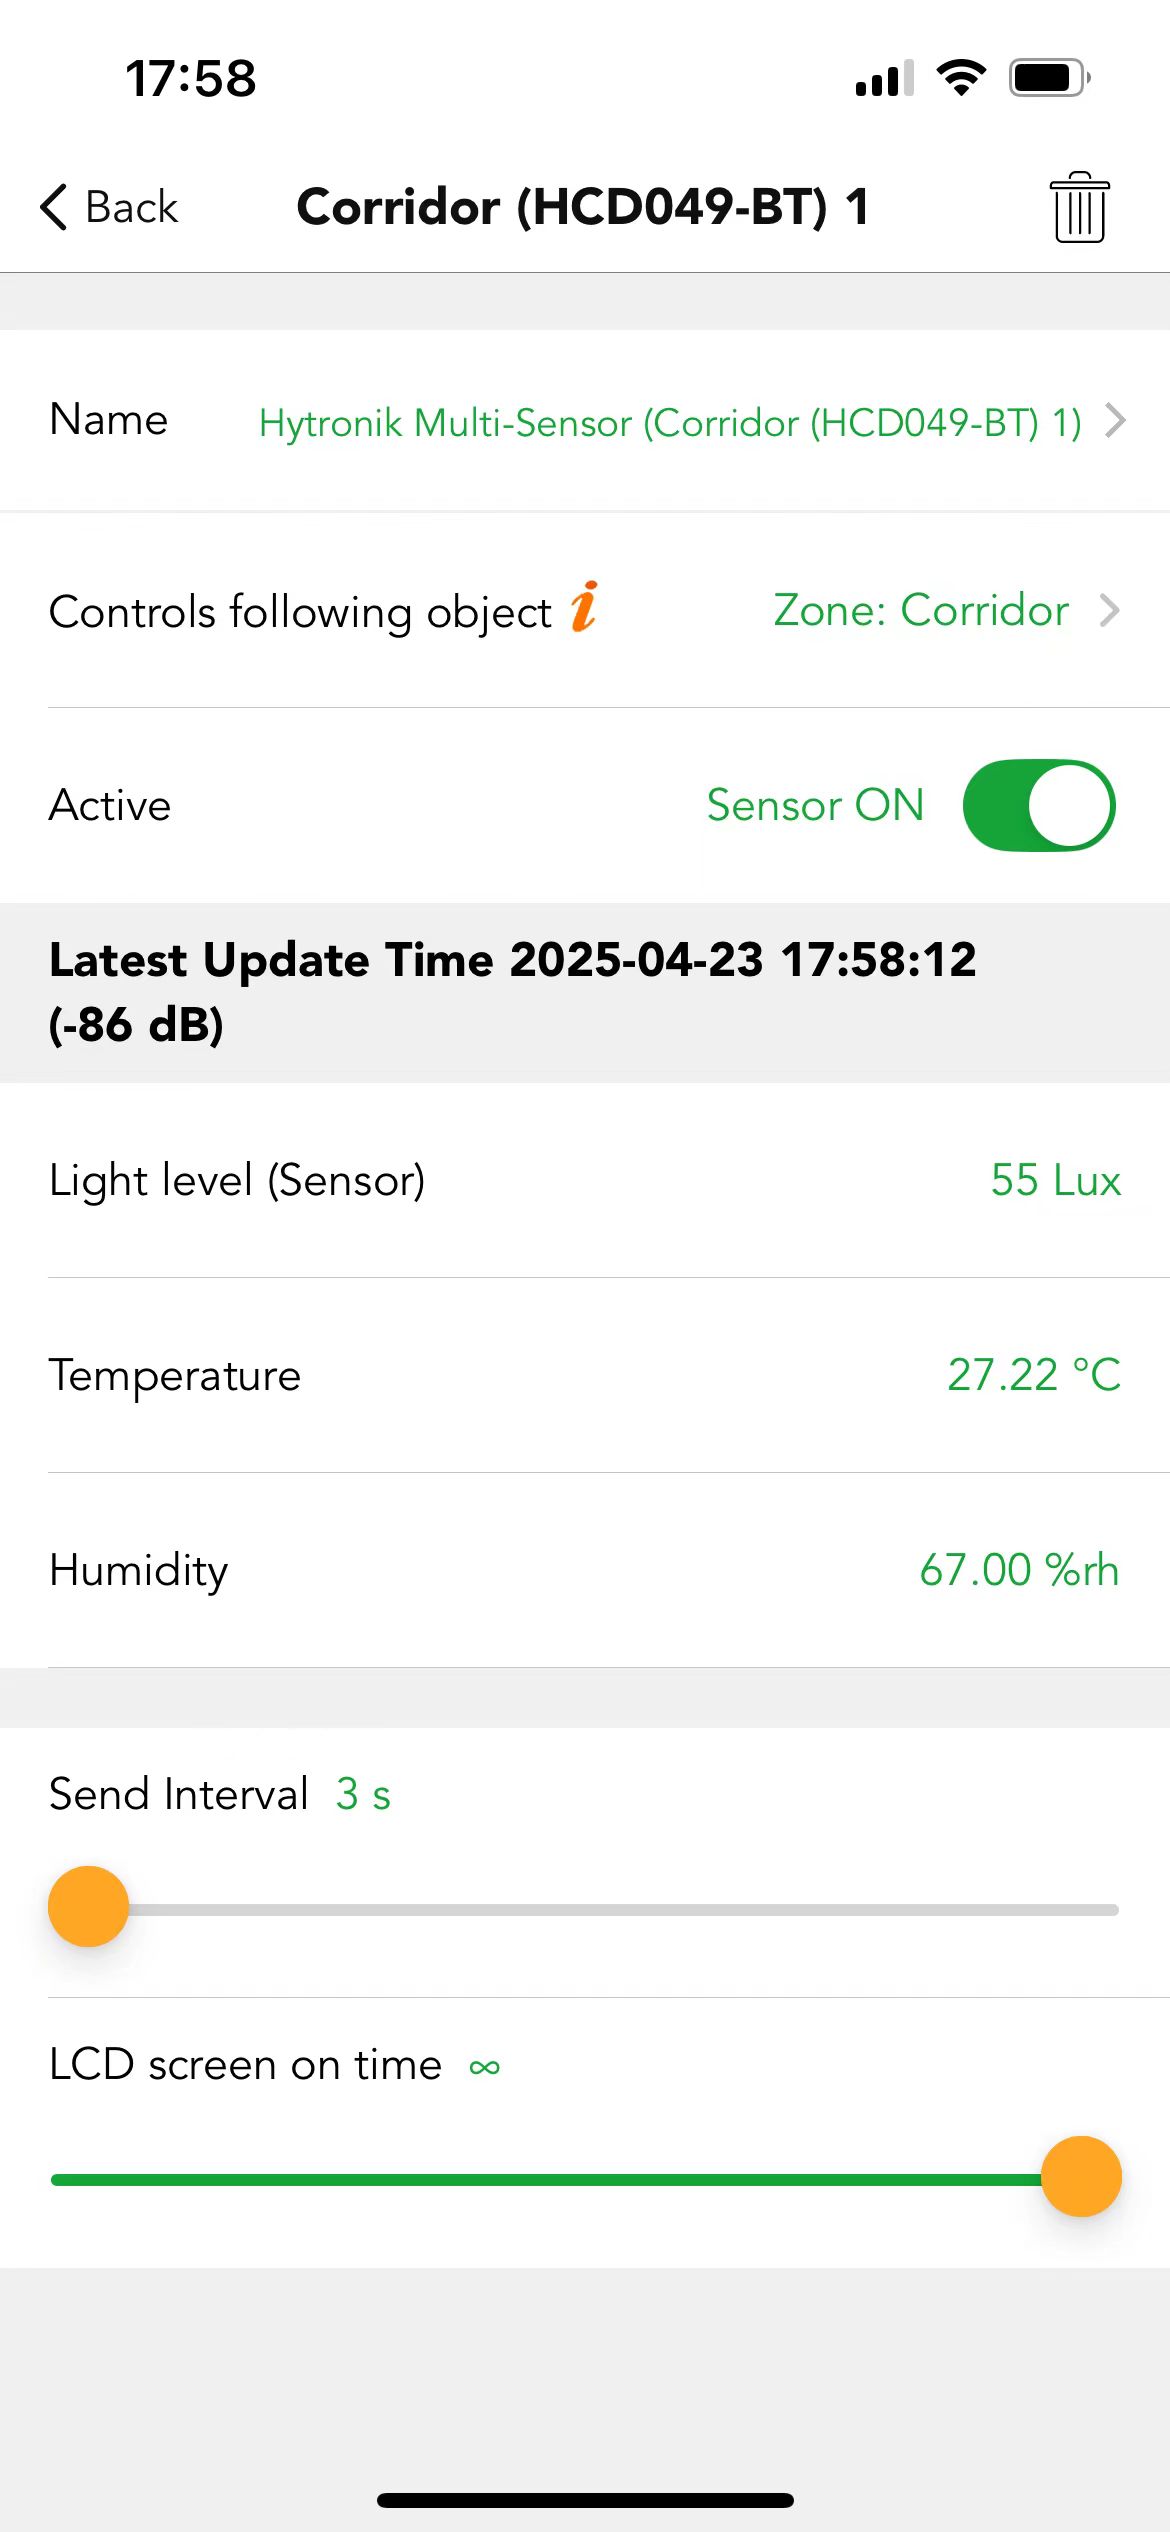
Multi-meter is actually a multi-function sensor,it measures the temperature, humidity and lux vaule of the zone where the connected device is located.Users can bind a Multi-meter by clicking “Add Multi-meter'' in the device settings page, Users can use camera to scan the QR-code on the Multi-meter or use the NFC function on the phone to bind the Multi-meter. After finishing, users can rename the multi-meter,and can check the control object and the light level detected by sensor,and also the temperature and the humidity.The products that support being added by the device are shown in the below.